Your Zenoti (formerly ManageMySpa) account was upgraded with the latest features. With this upgrade, we bring new features that will enhance your customers’ experience online as well as at your center. Webstore enhancements like SEO capabilities, new cross-sell opportunities, support for service and product variants and customized URL for your webstore takes you a step further to better customer experience and usability. Read on to get more details on all new features in this upgrade.
Appointment Book & POS
Send Registration & Service Detail Forms Via Email Before A Guest’s Appointment
You can send out registration and service detail forms to your guests to get all their personal and service related information before their appointment. This saves you and them time when they come in for the service. To send the registration or sign-up form to a new guest, right click on the appointment block for the appointment of that guest and select “Send Guest Data Link”. Alternatively, you can also open up guest details by clicking on View History for a guest and click the “Send Guest Data Link” button. To send the service detail form, right click in the appointment block and select “Send Service Data Link”. To edit the text for the email that is sent out, ensure you’re in the organization view, navigate to Admin > Organizations > Emails/Texts and click on the edit link next to Service Custom Data template from the list. This feature is available only for the Enterprise plan.
Restrict Cash Refunds
To date, Zenoti supported cash and prepaid card refunds for product returns. Now, you can restrict the refund option to only allow refunds in the form of a prepaid card. To disable cash refunds, ensure you're in the organization view and navigate to Admin > Organization > Settings > Invoice & Receipt. Uncheck the checkbox "Allow product refund by cash". This option is enabled by default.
Allow Refunds To A Credit Card
If products are purchased using a credit card and later returned, you can allow refunds to the same credit card. If multiple payment methods are used for the purchase, refunds can be done using either a prepaid card or cash.
Stay Informed Of Cash Value Discrepancies In The Register
Set up an email or text message alert to automatically notify you when the register’s actual cash value does not match with the expected collection amount at the time of register closure. You can set a minimal difference amount that is allowed, which would not trigger the alert. If you find that the actual and expected cash values differ, ensure that front desk are entering all payments through the system, using the petty cash log if taking money out of the register and generally keeping an eye on the register to mitigate any theft. To enable this alert, ensure you're in the organization view and navigate to Admin > Organizations > Alerts. Select the "Cash adjustment exceeded limit" alert under Appointment Book & POS. Click on the link to define the alert settings.
Order Services In A Day Package
Set a default order for services in a day package. The front desk can modify the order at the time of booking or from the schedule if required.

You can set up the default order of a day package while adding or editing services on the package.
Easily Access Your Customers’ Full Service History And Data
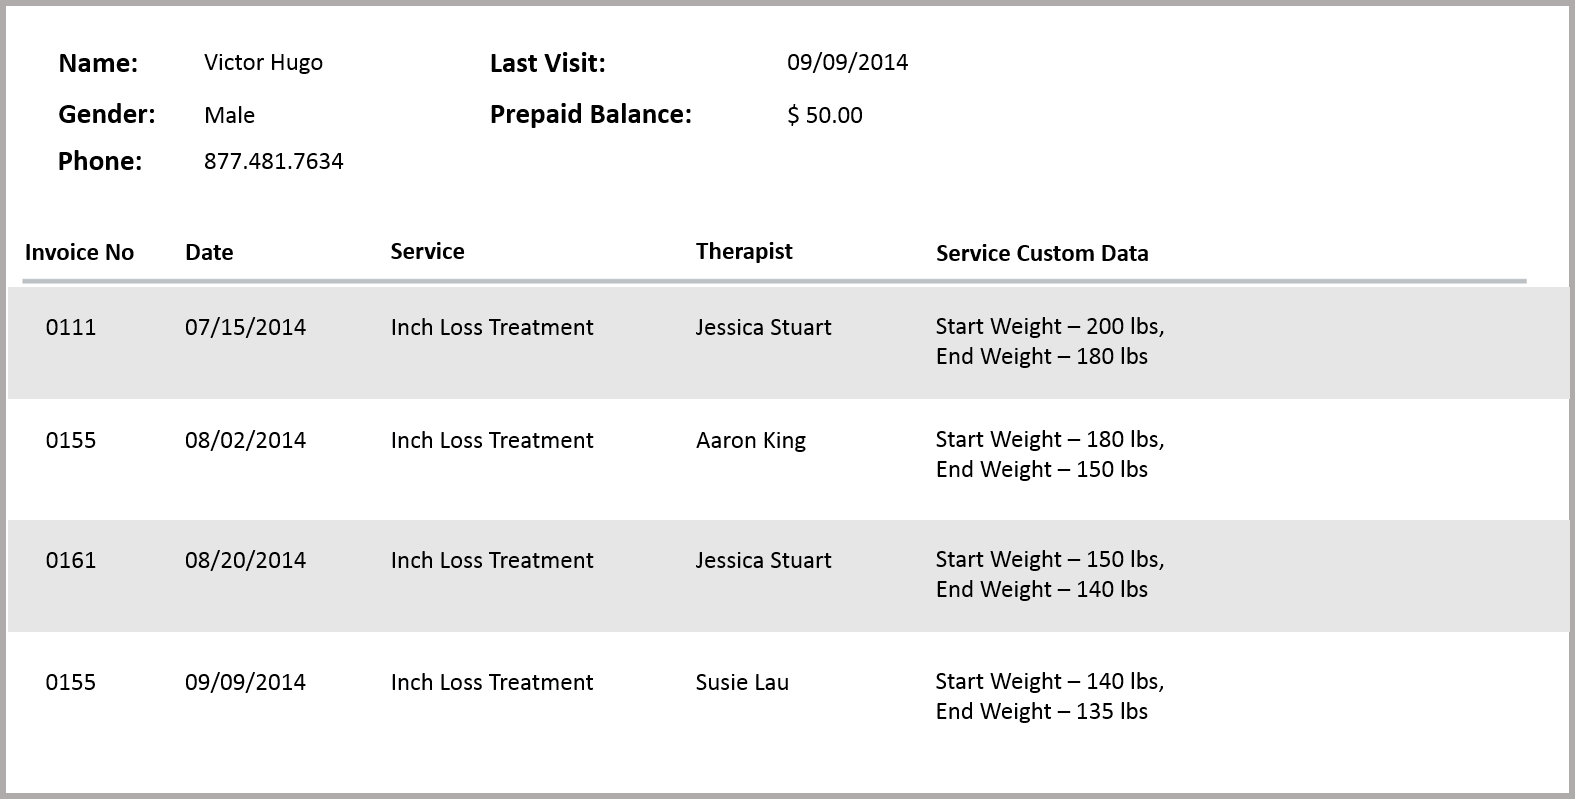
Record a customer’s progress on a treatment using service custom fields. For example, for a slimming package, you can record the start and end weights as well as BMI with every visit. Use the print feature to print the customer’s full history throughout the treatment.
Faster Day Closures
At the end of each shift, or the end of day, your front desk should be performing a Register Closure. When the front desk enters the Current Cash In Register amount, the Cash Adjustment value will now update automatically. Find out why closing end-of-day payments is highly essential >
Easily Identify Rebookings
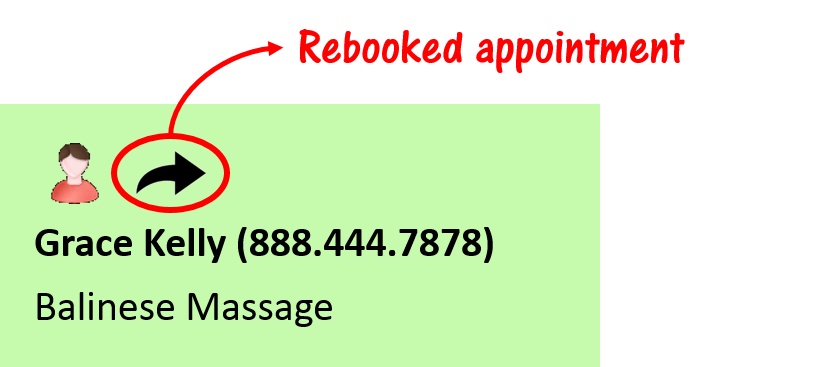
If you plan to give discounted services for customers who rebook their appointments, you should be able to identify these customers. We’ve made it easy for you to identify them by adding an icon on the appointment block. Once your front desk knows that the guest rebooked her appointment during her last visit, they can give the discount manually from the POS screen.
Marketing
New Email Macros
We’ve added two new macros that can be used in your emails.
- [CenterE-mail]: This macro allows you to add your center's email address when sending emails. Your customers can contact you through this email to contact you or to book appointments.
- [MailUnsubscribeLink]: This macro will allow your customers to unsubscribe from your emails. Once they click on this link, they’ll stop receiving emails from you.
Create Gift Cards With No Expiry
Some regional laws may require you to not have an expiry on gift cards. If this is the case, simply set the system to disable expiration dates for gift cards. To create gift cards with no expiry, ensure you’re in the center view, navigate to Admin > Centers > Settings > Invoice & Receipt. Uncheck the checkbox “Allow gift card to expire”.
Loyalty
Send Notifications For Every Loyalty Point Transaction
If you’re rewarding your customers with loyalty points, notify them every time they earn or redeem points using an email or text message. The customer will be up-to-date on their points balance, and the system helps control theft from staff and external folks from using others’ points.
Additional ways to keep your customers informed of their points balance.
Print loyalty points transactions on receipts - The system will print loyalty point transaction details on the receipt every time a customer earns or redeems their points. Allow your customers to check their balance online or using mobile apps - Your customers can also check their loyalty point transactions and balance on your website or on the mobile app for your customers.
Inventory
Manually Mark Your Stock Consumed During Checkout
Earlier, you could checkout your consumable products from store to floor, which are marked as consumed when a service, which uses this product, is delivered. If you use products that are not associated with any service but are still consumed at your center, you can now manually mark them consumed during the checkout process. To do this, select the checkbox “Checkout for consumption” for each product that you want to check-out and mark as consumed. These products will be shown as consumed in the inventory reports.
Sales
Receive Notifications For New Sales Opportunities
Set up text or email notifications when a new opportunity is created in the system. You can set up notifications to be sent to the sales owner as well as the business owner or manager. To set up these notifications, ensure you’re in the organization view and navigate to Admin > Organization > Email/Texts. Click on the Edit link for “Opportunity Create” to modify settings.
Various Ways To Create A Sales Opportunity
Use sales opportunities in Zenoti for regular follow up with your customers and prospects. With this upgrade, a new sales opportunity is created when a recurring payment for any membership fails. Have Zenoti create a sales opportunity automatically from the following:
Incoming Enquiries From Your Website - If you’ve set up a “Request a Consultation” form on your website, you can link it to your Zenoti account – the system will automatically create a sales opportunity when a lead fills the form on your website. The same applies to any Google AdWords traffic you direct to your website.
Membership Expires - Set up your account to create a sales opportunity when a customer’s membership is expires. Your staff will know to follow up with the customer for renewals. For a step-by-step procedure to set up when an opportunity is created, check out our support article Automatically Create An Opportunity For Membership Renewals.
Membership Payment Failure - If you use recurring payments on a membership, a payment may fail if the credit card on file has expired or been cancelled. You can set up the system to create an opportunity when a payment fails and be assigned to an owner for follow-up. To set this up, ensure you’re in the organization view, navigate to Admin > Organization > Settings > Memberships and select the checkbox “Create an opportunity to follow up” under recurring payments.
Manually Create A Sales Opportunity - If a customer calls at your center, you can create an opportunity from the sales module for your sales team to follow up.
Webstore & Mobile Apps
More Customizations In Your Mobile App For Customers
We’ve added more customization features to enable you to further modify the customer mobile app. For more details, contact support.
Promote Cross-Sell Opportunities On Your Website
If a customer’s looking at an acne skin treatment on your website, why not promote an acne skin care product as well? You can now set up service and product recommendations to display with each service or product on your webstore.

To set up recommendations for a service or a product, click on the “Related” tab while creating or editing the service or the product.
Drive Traffic To Your Website With Built-In Search Engine Optimization (SEO)
We’ve updated our webstore pages with built-in search engine optimization. This means you’ll attract more traffic to your site – without any extra effort from you!
Customize Your Webstore’s URL
Your webstore’s URL currently looks something like yourBrand.Zenoti.com. Update this to any URL, for example store.yourBrand.com or booknow.yourBrand.com. For more details on how to set this up, contact support.
Accept Coupons Online
Accept coupon codes during online booking and online purchases.
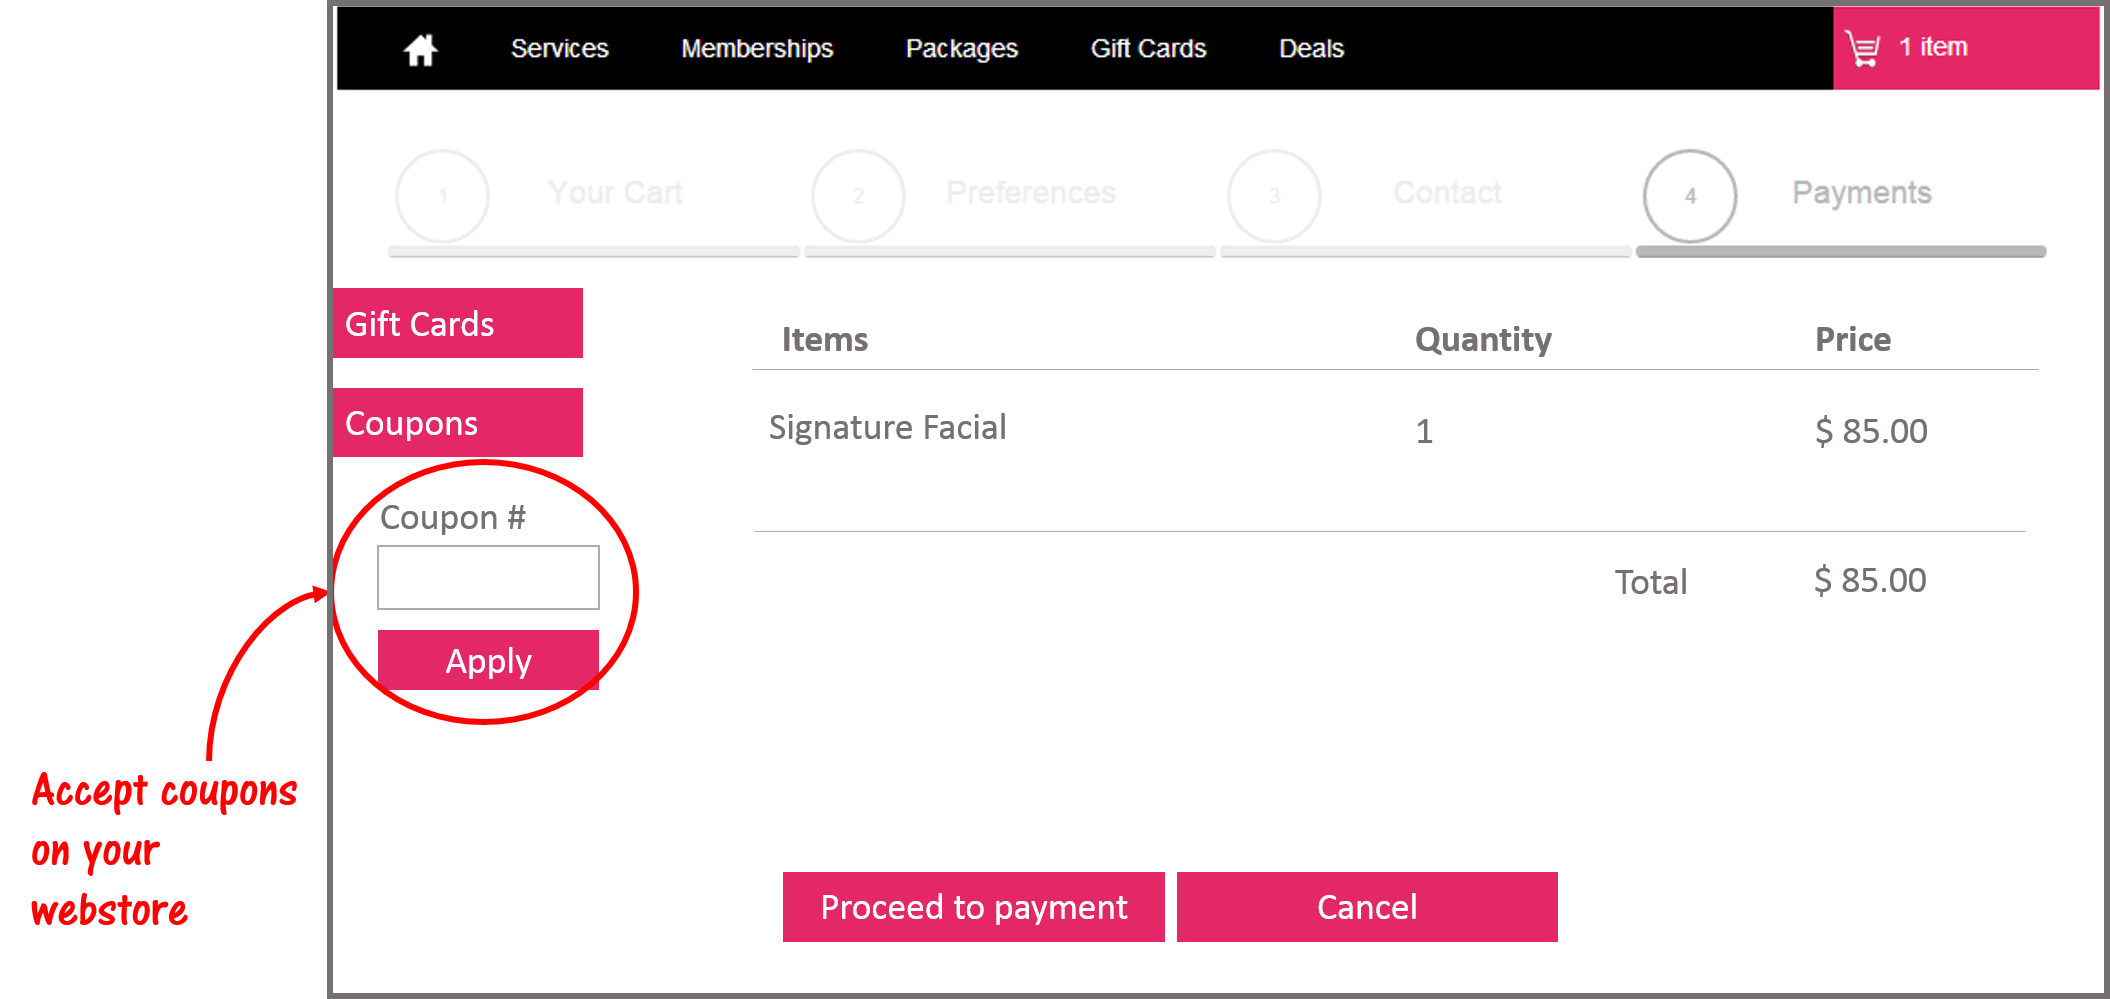
You can distribute coupon codes through flyers or third party websites and allow your customers to enter them on your webstore. To set up these coupons, ensure you’re in the organization view and navigate to the Marketing tab. Select the Media campaigns under the header Campaigns. Create a new campaign by clicking the Add button and entering the campaign details. Make sure you note down the Campaign Code – use this code for Coupon Code. To accept coupon codes on your webstore, you’ll have to select the checkbox “Allow to enter campaign code” under Online Booking in the Catalog tab of the organization settings.
Customize How You Display Services & Products
To date, you could display your products and services on the webstore based on categories and sub-categories. Now you can completely customize how you want to display these services and products. For example, you can group services for men and women separately, bring all products for sensitive skin under one header, or showcase special services for Valentine’s Day or Halloween. We’ve introduced Tag Groups which will allow you to simplify navigation on your webstore for the customers. You can combine various tags in a tag group to display services and products in a way that will relate to your customers.
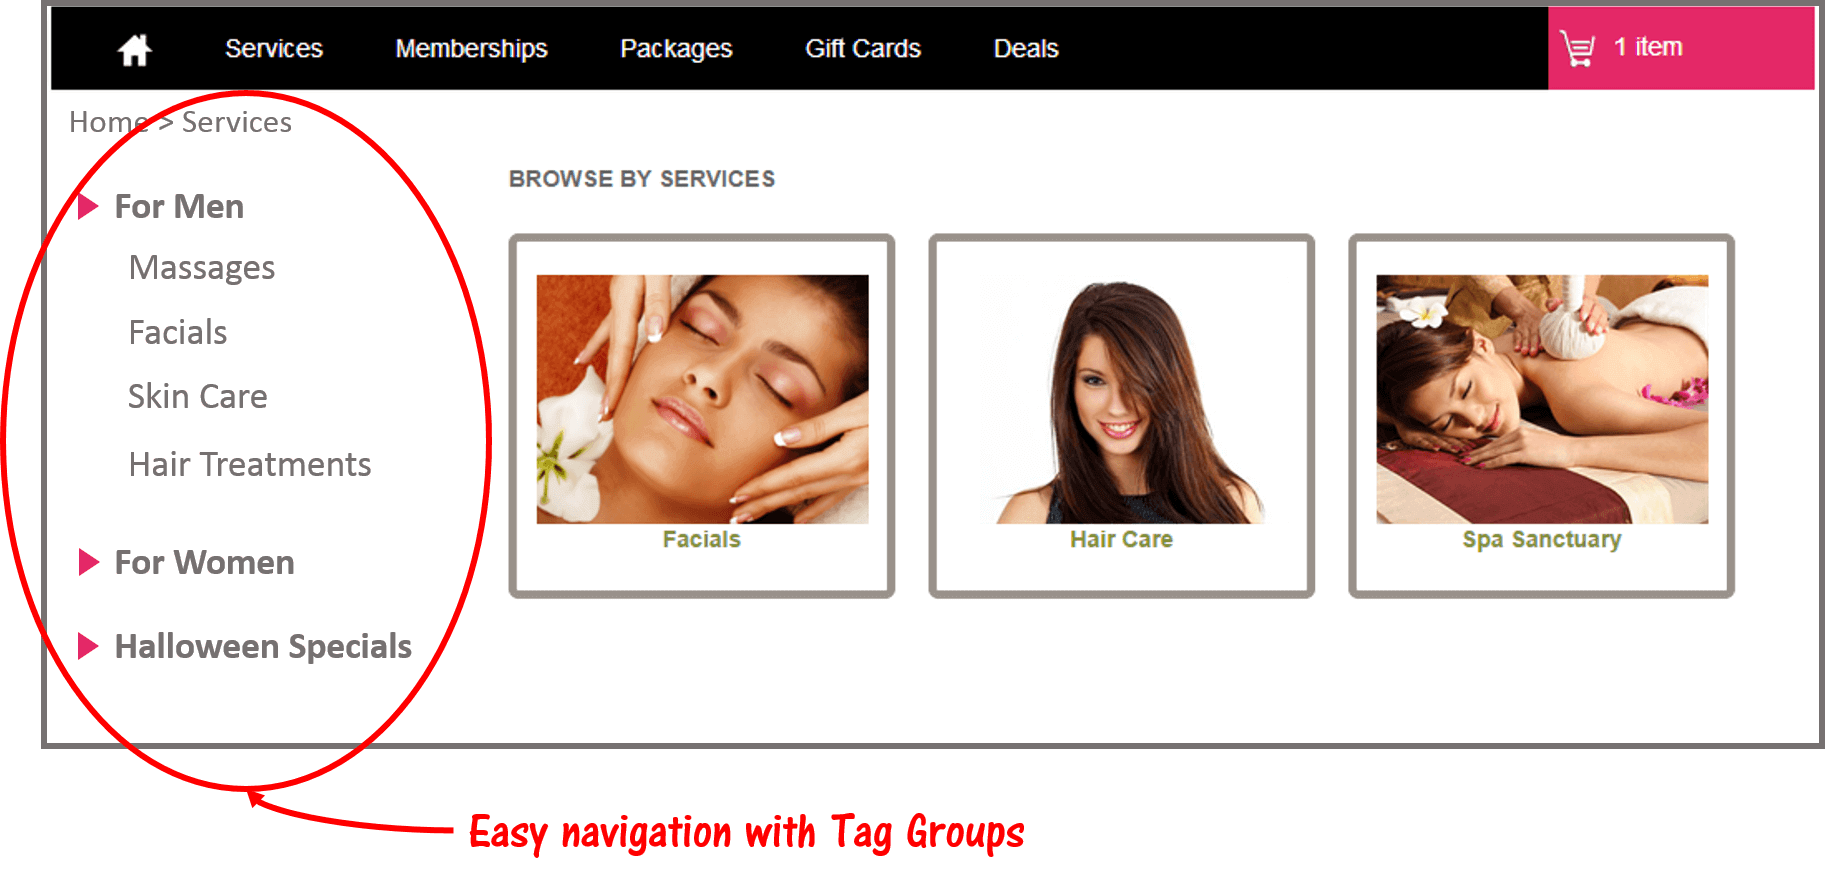
To create Tag Groups, navigate to the Admin screen in the organization view and click on the link “Tag Groups” under the header Resources. Click on the Add button and enter all the details. This feature is available only for the Enterprise plan.
Enable Service & Product Variants On Your Webstore
It’s common to have a service or product with slight variations in the offering. For example, for a Woman’s Hair Cut, variants might include different pricing for short hair, medium length hair and long hair. Variants enable you to list one service with multiple options to choose from.
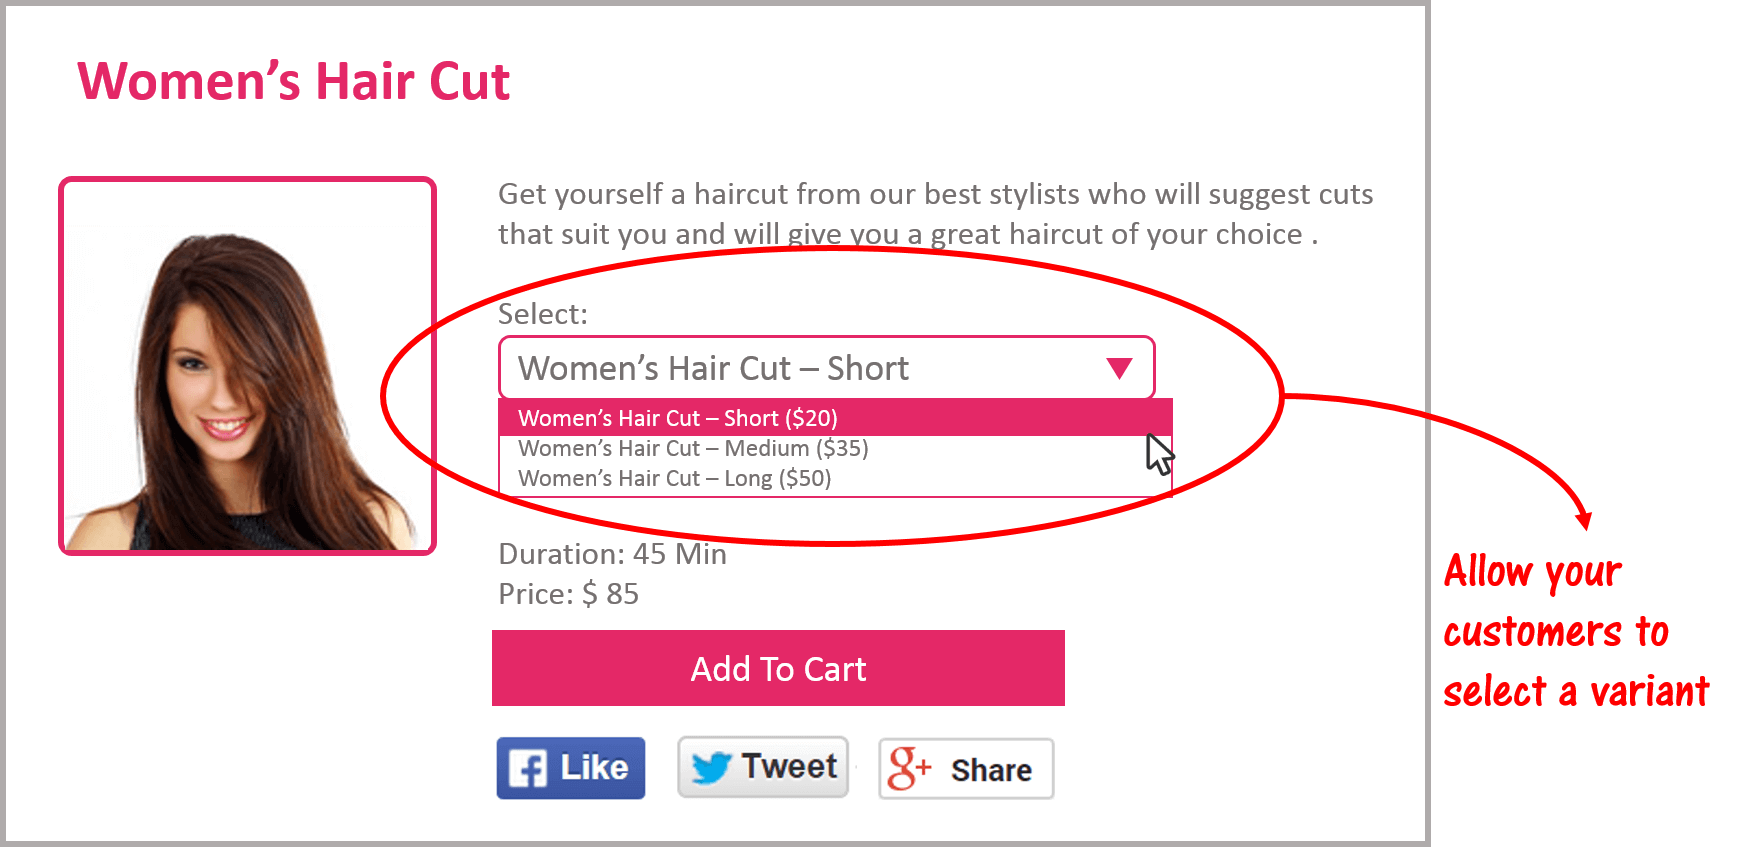
Similarly, you can set up variants for products. For example, skin cream could be of different bottle sizes, like Small – 50ml and Large – 100ml.
To set up variants for a service or product, edit that service or product from the Admin screen. You will see a new tab called Variants.
To learn more about any of our new features, contact support.


